Covers have been constructed, tailgate solutions found, solar systems synthesized, a keyboard built into a dinette, and more. Choose your favorite Mega Mod, and vote.

Welcome to the April 2016 Monthly Mod Contest. Please review the following six Mega Mods and vote for your favorite. We will announce the April 2016 Mod Contest winner next week. For more information about the Monthly Mod Contest, including how to enter, click here.
Click here to vote for your favorite April Mega Mod!
April 2016 Mod Contest Entries:
1. Alain Larose, Pointe Aux Outardes, Québec
2011 Ford F450
2005 Lance 1181

When in storage, I want to protect our truck camper from bad weather, heavy snowfalls, rain, and strong winds. To accomplish this goal, I started with a small snowmobile garage frame that’s 6-feet x 6-feet x 12-feet and mounted to 2-feet x 6-feet x 12-feet wood pieces.
 |
 |
I then covered the garage frame with a tarp. Another approach would be to pick up a truck garage cover that’s 12-feet x 20-feet x 8-feet.
 |
 |
For the last four years, the frame and tarp cover has worked perfectly. There has been no snow accumulation and it’s very good protection against bad weather and UV rays. The frame and tarp cover are light and offer strong protection with good ventilation inside.

It took me 10 hours to complete and cost $300. In my opinion, the skill level of this mod is medium.
2. Stephen O’Neal, Miami, Florida
2013 Chevy 3500 HD
2011 Alaskan 11

I wanted to have a solar power system that would enable me to extend my time time off-the-grid. Since I was going to have to make DC wiring runs for solar, I also made AC wiring runs to install a Mach 8 Colman air conditioning unit at the same time.
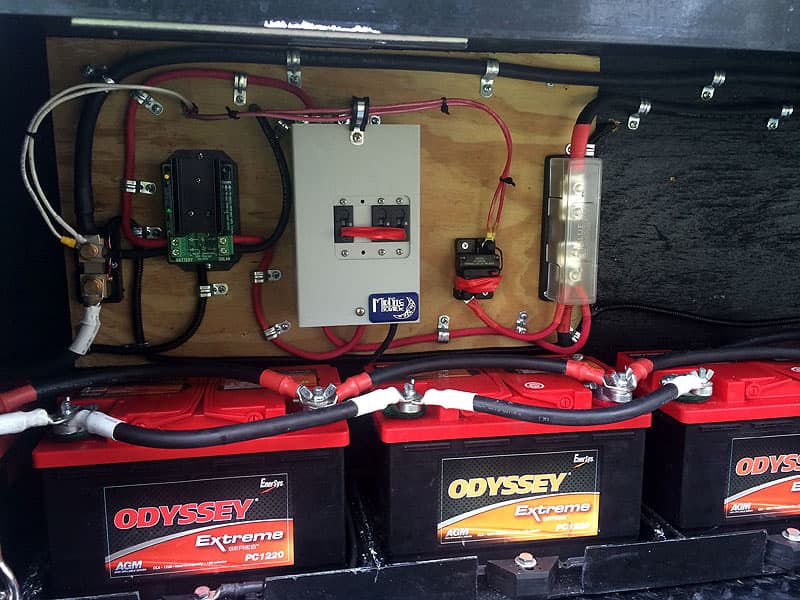
Initially I purchased an off-the-self system but, after running into an article on solar power, I realized that everything I thought I knew about solar was wrong. The only items I kept from the off-the-shelf-system were the solar panels.
I purchased a Bogart Engineering smart charger that allowed me to customize the charging profile to the battery manufacturer’s specifications.

I had to resize the cables from 12 AWG to 6 AWG to take care of voltage drop over a 22-foot run and build a control panel and cables from scratch for my four house batteries. I also put in provisions for a future inverter.

The installation was a challenge because it required to blind drill through the inside of the framing of the roof; a 2-inch space in two separate locations. Both were done from the 2-foot x 2-foot roof opening for a exhaust fan or air-conditioning unit.

The first was a 20-inch drill for the cable run from the control panel, which was located on the outside of the Alaskan, and the second was a 12-inch to a power junction box on the roof.

The Alaskan has a wood frame roof on 16-inch centers so the Z mounting brackets on the panels had to match the spacing of the 2-inch x 2-inch frames. I used 1 1/2-inch wood screws and put a very high bond (VHB) tape on the Z foot to keep moisture from entering the roof and help carry the wind load.
It has worked out well running my biggest load; a Norcold DC refrigerator 24/7. However, I want to purchase a small generator for charging the batteries on cloudy days and to run the air conditioner when needed.
It took me 45 hours to complete and cost $2,300. In my opinion, the skill level for this modification is medium for the use of the tools, and hard for some technical expertise and components.
3. Mark Siminoff, Mountain View, California
2005 Dodge Ram 3500
2004 Alpenlite Saratoga 935

We are currently traveling our with two children in a truck camper for a full year. A significant chunk of our daily routine is dedicated to education and our homeschooling curriculum, which includes music.
One of the instruments both kids are learning to play is the piano. Of course, it’s no simple task to squeeze a piano into a truck camper. So, as part of the preparation for our trip, I researched compact keyboards and came across the Alesis V49.
This MIDI keyboard is compact enough to travel with us. It has a great feeling keyboard with velocity sensitive keys, is USB powered, and can play on and through our iPad. From there it plays through the truck camper’s stereo speakers, or through headphones.
 |
 |
 |
 |
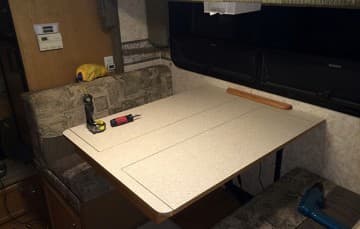
The big challenge, of course, was finding a place in our tiny truck camper to store a MIDI keyboard. After some searching and measuring, I realized that the keyboard was about the same length as the dinette table, so I decided to make a new tabletop with the keyboard tucked away inside of it.
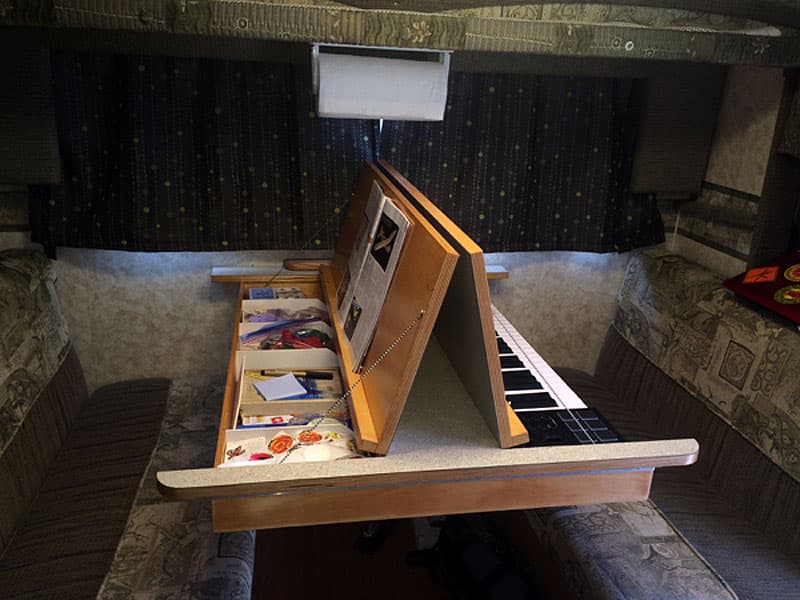
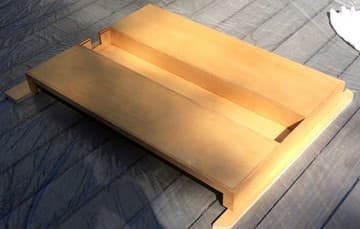
I chose to create two separate storage compartments within the table; one for the keyboard and the other for school and craft supplies. Accordingly, the tabletop has two doors. When open, each door has small ledge which can also be used to support a book, classwork, or an iPad.
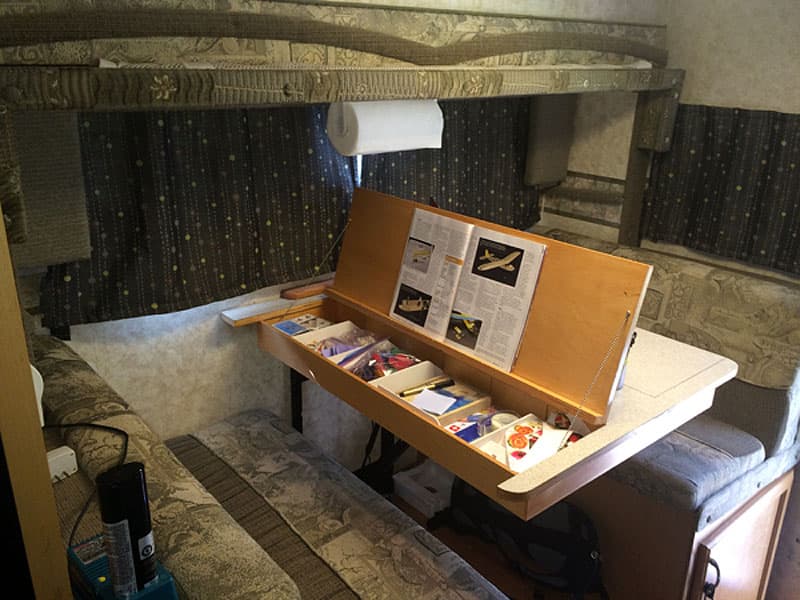
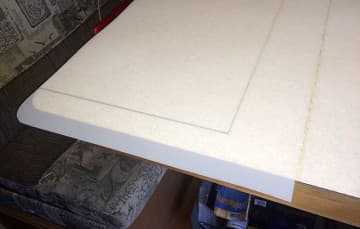
I fabricated the new tabletop entirely from scratch using 3/4-inch 13-ply birch for the top and 3/8-inch 7-ply for the boxes. The top surface is Formica high-pressure laminate and the interior and exterior surfaces have been finished with a durable satin polyurethane and stain.
For times when the kids are working on projects (or meals) that might get messy, I made a pair of 1/16-inch thick LDPE cover sheets that are fitted to the tabletop. When not in use, these sheets are stored behind the dinette’s back cushions.
The whole family uses this table every single day. We eat breakfast, lunch, and dinner on it. We also do home schooling, craft projects, and practice piano lessons. I even composed this Monthly Mod Contest application on it. In the evening, the dinette converts into my daughter’s bed.
This modification took 36 hours to complete and cost approximately $600 including the MIDI keyboard. In my opinion, this mod was hard because I had to ensure that everything would fit.
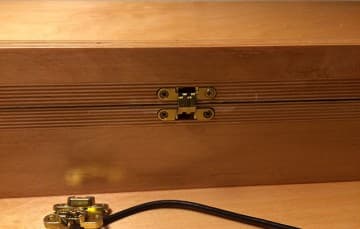
The entire assembly was designed in CAD (SolidWorks) before a single piece of wood was cut. Creating the table top and boxes required extensive carpentry skills, especially pocketing the hidden hinges. Specialized tools were needed to apply the Formica laminate and polyurethane finish.
4. Russell and Gretchen Berquam, Livingston, Texas
2014 Ford F-350
2015 Arctic Fox 1140
We don’t like driving around without the tailgate on the truck. When we were out in our truck camper with the camper off of the truck, it was always a disappointment to have part of the truck missing. I wanted to have the truck tailgate on the truck when we took the camper off of the truck.
I figured out a way to keep the tailgate on the truck when the camper is both on and off. Now, when we remove the camper from the truck, it takes about 2-minutes to disconnect and close the tailgate. Then it looks like a complete pickup truck.

I had previously installed angle iron rails in the bed of the truck to keep the camper in place, so a small extension to support the tailgate was a fairly simple addition.
The clear underside area of our camper extends 24-inches past the end of the truck bed, which is enough room to permit the tailgate to fit unobstructed under the camper without braces or tanks in the way. I did not include complete construction details since every truck and camper would require different sizes.
 |
 |
The under view of the truck with the camper on, and the tailgate on and extended

This photography shows the rail extension flipped out and bolted to the tailgate. A bolt plate was added to the inside of the tailgate (not shown). A second cable bolt was added to hold the cables out of the way when they were not holding the tailgate in the normal configuration.
The cables that normally support the tailgate in the open position had to be disconnected since the camper would hit them and the cables hold the tailgate slightly above level. A different method of holding the tailgate up was required.
When the cables are disconnected from the tailgate, it pivots down and rests on the bumper and would damage the tailgate. The cables were disconnected and attached to a temporary bolt to keep them out of the way while the camper is on the truck.
A swing out bracket was added to the angle rails to hold the tailgate in the level position and off of the bumper. The brackets were constructed from 3-inch x ¼-inch flat iron. I made two at 24-inches and two at 17-inches. The metal and bolts were about $30 and an additional $10 for the welding. A short mounting bracket could be used instead of the angles which I have installed in our truck.

The extension pivots out on the bed rails and then the tailgate is bolted to the extensions.

This photograph shows the rails in truck with the extensions folded forward.
Since most projects like this are 90 percent design and 10 percent doing, it was months in design and the construction only took about 2 days to complete. After several camping trips with the tailgate on the truck, I wouldn’t change a thing
It took me 15 hours to complete and cost $40. In my opinion, the skill level of this mod is hard.
5. Charles Spray, Bryson City, North Carolina
2002 Ford F-350
2001 Lance 1010
My wife needed an improved step to safely enter and exit the camper.

We also needed additional storage carrying capacity when not towing our boat or enclosed car trailer.

I bought a hitch mounted cargo carrier with a folding ramp. Then I modified it to connect to a Torklift SuperHitch with a Super Truss for increased stability. I added LED lighting for increased visibility.
 |
 |
It works well. Since the initial install, I have purchased a folding step to use instead of the ramp, and added stabilizer jacks designed for a tent camper.

Now the assembly does not wobble when the unit is parked and we use it for a step.

It took me eight hours to complete and cost $700. In my opinion, the skill level of this mod is medium.
6. Jim and Anne Beach, Red Deer, Alberta
2009 GMC 3500HD
2012 Arctic Fox 865

We wanted a hitch extension that would be the same the hitch height (23 to 24-inches) as the utility trailer used for hauling our RZR. Most hitch extensions are straight and sit too low for the hitch height of the trailer.
At this height the trailer is level with the truck and looks consistent with the rest of the rig. The other factor was wanting to keep the hitch high enough so the that it wouldn’t hit the road surface when going through dips and rough trails.

The GMC dually had a two and a half inch hitch tube. That is what was used for the foundation of the hitch extension; a 2 1/2-inch x 2 1/2-inch x 1/8-inch wall tube. We could have used 3/16-inch wall, but I wanted to keep the weight down. Most purchased hitch extensions are 3/16-inch wall.

After a series of measurements were made, a simple drawing of the design was the result.
The hitch required an 11-inch kick to get the height up to the required 23-inches. Loaded with the camper, the 2009 GMC dually stock hitch is about 12-inches from the ground. 12 + 11 = 23 inches.
Another thing that was important was that the hitch was not to interfere with the Fox Landing step when it is down or up. The landing has a curved cut out that seems to have been made to fit a hitch extension. Thanks, Northwood.
From the pictures you can see there are quite a few parts that need to come together for the hitch extension to fit right and be strong enough to take the load of a 2,000 or 3,000 pound trailer with a hitch weight of 150 to 200 pounds.
 |
 |
Above left: Rear tie-down and chain mount, Above Right: Front tie-down mount
I also built turnbuckle ties that connect to a frame cross member at the upper rear of the truck above the spare tire. The two side chains and turnbuckles connect to the rear tie-down mounts. The tie-down mounts were custom built to fit the truck because of the type of running boards the truck had on it when we bought it.
The funny thing with the tie-down mounts was that we built them sight unseen before picking up the camper. They worked perfectly and didn’t require any changes from the first build. Luck was on our side with them.
The hitch has an extension for the seven pin RV plug, so the trailer plug fits where it is supposed to.
 |
 |
The hitch extension is bolted in the pin holes for the stinger and the truck hitch is also a 5/8-inch bolt. Anti-rattle pinch bolts are also used on the sides and bottom of the stinger hitch so there is no noise from loose parts. I would install these on any hitch. When in use, they get rid of the constant tap and squeak from most hitches.
This has been a great mod and it turned out really well. I wouldn’t change anything from the original design. We keep the camper on the truck throughout the year. So far the hitch has stayed on the truck as well. With the Fox Landing up, the the hitch sticks out only about eight inches. With it down, it is completely covered. With the Fox Landing step down it provides an easy and safe way to get into the utility trailer when stopped.
It took me eight hours to complete and cost $120. In my opinion, the skill level of this mod is hard.
Click here to vote for your favorite April Mega Mod!
Disclaimer: The modifications above are submitted by Truck Camper Magazine readers. It is your responsibility to make sure that any do-it-yourself modification project you undertake is safe, effective, and legal for your situation.
Enter Your Mods Now!
If you’d like to enter mods into TCM’s Monthly Mod Contest, click here. You can enter as many mods as you want, at any time. Good luck mod makers!
The post April Mod Contest: Mega Mods appeared first on Truck Camper Magazine.